Connect to Knox from a Windows 10 computer
Connect to your Knox folder by mapping a network drive that connects to your folder automatically whenever you sign into your computer.
These instructions are for computers running Windows 10 that are connecting to Knox folders with SMB3 enabled.
Instructions
- On Windows 10, open File Explorer by clicking the folder icon in the task bar or by pressing the Windows logo key + E on your keyboard.
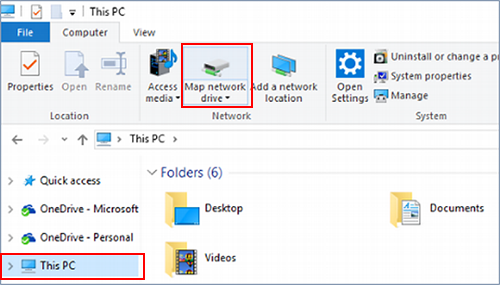
- Select This PC from the left pane. Then, on the Computer tab in the ribbon, click Map network drive.

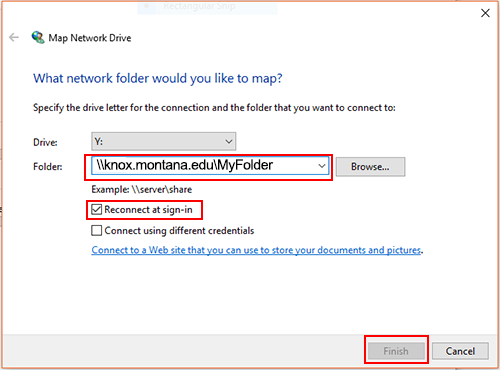
- Select a drive letter from the Drive dropdown. (Any available letter will work)
See image below for steps 3 & 4. - Type the path to your Knox folder in the Folder field as shown here:
\\knox.montana.edu\MyFolder - replacing MyFolder with the real name of your Knox folder.
- Check the Reconnect at sign-in check box if you’d like to automatically connect each time you sign-in to computer.
- Click Finish.
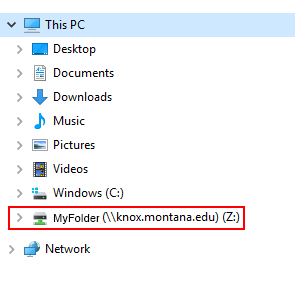
You will now be able to access your Knox folder from the File Explorer. A link to the mapped drive will appear in left pane as shown below.

